Monday, December 31, 2012

A Guitar Called Jack--Part 77

Gerry then buffs the bridge with rouge buffing compound.  No finish is applied.  The shine you see is simply the natural oils from the ebony coming out from the buffing.  The final step before installing is to radius the bottom of the bridge to the same shape as the soundboard on which it will sit (be glued to).

Sunday, December 30, 2012

A Guitar Called Jack--Part 76

Next Gerry sands the bridge, first with 200 grit, then 400, and finally with 800.

Saturday, December 29, 2012

A Guitar Called Jack--Part 75

Here Gerry has the bridge mounted (using double sided tape) on a board edge, which in turn is held in the vice. This allows him to have both hands free to chisel, scrape and sand the "wings" of the bridge down to their approximate shape and thickness.

Friday, December 28, 2012

A Guitar Called Jack--Part 74

The bridge is first rough thicknessed (it is somewhat thicker at the bass E string than at the treble E).  The profile (shape of the footprint) of the bridge is then cut and refined with the spindle sander.  Next the two saddle slots are routed, and the saddles are cut and rough fitted.  Then the back surface of the bridge is "tipped" to a 15 degree angle, on which the bridge pin holes are drilled.

Thursday, December 27, 2012

A Guitar Called Jack--Part 73


Cleaning up the fingerboard: First, Gerry adjusted the trussrod so that the fingerboard is more or less flat (i.e., no relief). He then leveled the fret-tops. Once the fret-tops are level, he re-radius the fret-tops, as they now have flat spots on top where they were leveled. After the fret-tops are re-radiused, the frets and fingerboard are sanded and buffed. (In the picture you can see lots of junk on the fretboard which gets removed with the final sanding and buffing.)

Wednesday, December 26, 2012

A Guitar Called Jack--Part 72

Here the neck has been attached to the guitar body. The overhang is clamped down onto the soundbox with four different clamps and cauls. Not a great deal of clamping pressure, but enough.

Next up... making the bridge and saddle and installing it; leveling and dressing the frets; installing the bridge pins; set-up (including making the nut); pickup installation; pickguard installation; guitar strap button on underside of neck heel and finally a bit more hand polishing.

Tuesday, December 25, 2012

A Guitar Called Jack--Part 71

Here the body is prepped for the neck to be installed. The footprint for the fingerboard overhang has been enlarged to its full size. This area is bordered with masking tape (3 layers high), creating a small ridge so that the fingerboard overhang will not move out of place while the glue dries attaching the overhang to the soundboard. (Gerry uses only a little white glue under the overhang and none at all on the heel itself. This join doesn't require much staying power, as the neck heel is bolted onto the soundbox, and the fingerboard overhang naturally pushes down on the soundbox. White glue is used, so that in the future if the neck needs to be removed (e.g., to replace a broken truss rod, or to reset the neck), the glue will release more readily, than say, if yellow glue had been used.

Monday, December 24, 2012

A Guitar Called Jack--Part 70

The neck heel... after both tropoli and "White Diamond" buffing applied (everything gets buffed twice: first with the brown tripoli compound and second with white diamond compound; after that the entire guitar gets hand polished to give the finish a deep lustre). 

Sunday, December 23, 2012

A Guitar Called Jack--Part 69

The soundboard with the lower portion buffed with tripoli - the upper portion waiting for Gerry to set the camera down and get back to work.

Saturday, December 22, 2012

Xaver Grand Concert

This fine Xaver Grand Concert sits at the 14th Fret Music Store in Toronto--just waiting for a home.  I would love to own this little guy--I do not have a guitar this size.  This fine piece has three major upgrades, i.e., cutaway, side soundport and the world famous Laskin armrest.  Oh, and the bear claw markings on the Sitka Spruce top add to the uniqueness of this fine instrument.  If I lived closer, I would go to the 14th Fret often to play this beautiful guitar on a regular basis.  Send Santa down to pick it up--better yet, go there and get it yourself.  Please comment on this post if you would like to see more Xaver Guitar wallpapers, or, simply visit the Xaver Guitar web site.

A Guitar Called Jack--Part 68

This shot shows the back after the lower right quadrant was buffed with the "Brown Tripoli" compound. In comparing the buffed area to the rest of the back, you can see that even after the first compound, the lustre is substantially back - except now it is shiny AND smooth.

Friday, December 21, 2012

A Guitar Called Jack--Part 67

Cutaway... Smooth and dull.

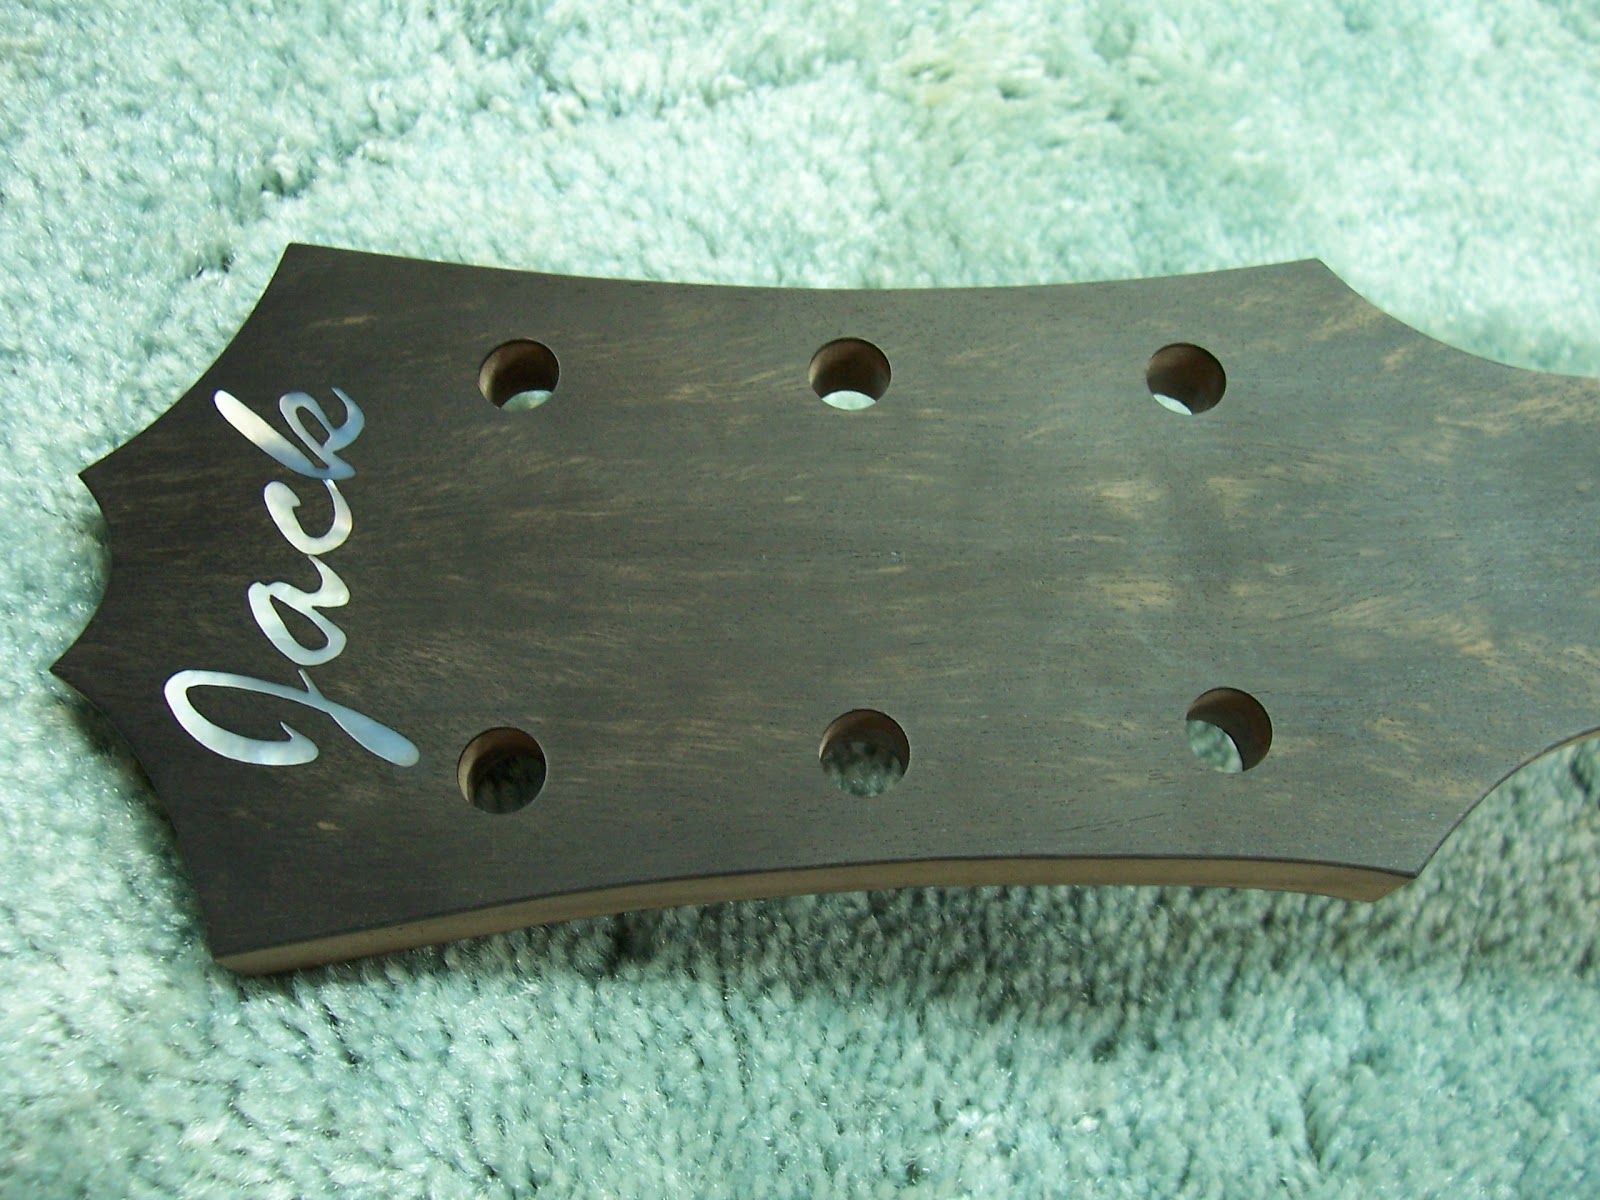
OK. You get the picture.... Same thing with the neck. Onto the buffing, to bring the shine back, because "dull" gets boring very quickly.

Thursday, December 20, 2012

A Guitar Called Jack--Part 66

Soundport... Smooth and dull. (Perhaps a new name for a shampoo?... Shampoo with "Smooth and Dull" to get that fresh buffed look....Nah.)

Wednesday, December 19, 2012

A Guitar Called Jack--Part 65

The leveling of the finish was completed a few days ago.  Here's a shot of the side and armrest once leveled. Smooth and dull - just as we want it at this stage.

Tuesday, December 18, 2012

A Guitar called Jack--Part 64

Another shot of the leveled back.  It's a bit of a messy process... first Gerry lightly dry sands with 400 grit, just to "knock the bumps off".  Then, he sharpens his scraper to a micro-fine edge, and "scrapes" the lacquer untill all the shiny spots are removed.  At this point the surface is effectively level.  However, to facilitate the buffing stage, he finishs off the leveling process by wet-sanding the surface with 1000 grit sandpaper.  This leaves the surface mirror smooth, just what we want, in preparation for the buffing.

Monday, December 17, 2012

A Guitar Called Jack--Part 63

Here's the back after leveling.  In this shot the smooth surface is a little easier to see.  You can also see how the surface is dull (flat, with no reflections). After all the surfaces are leveled, the second phase will bring the lustre back, with the buffing and hand polishing, except now it will be shiny and smooth

Sunday, December 16, 2012

Who Owns This Guitar?

There is probably no other guitar on the planet as identifiable as this one.  Comments please.

A Guitar Called Jack--Part 62

This shot shows the soundboard after it has been leveled. It is difficult to see a major change from the previous shot. But, you might notice that the soundboard is now dull, not shiny. What is not easily apparent is that the soundboard is now perfectly flat and smooth to the touch. On to the back and sides....

Saturday, December 15, 2012

A Guitar Called Jack--Part 61

It is now the third of December and things are going well.  The next step is "finishing the finish". 
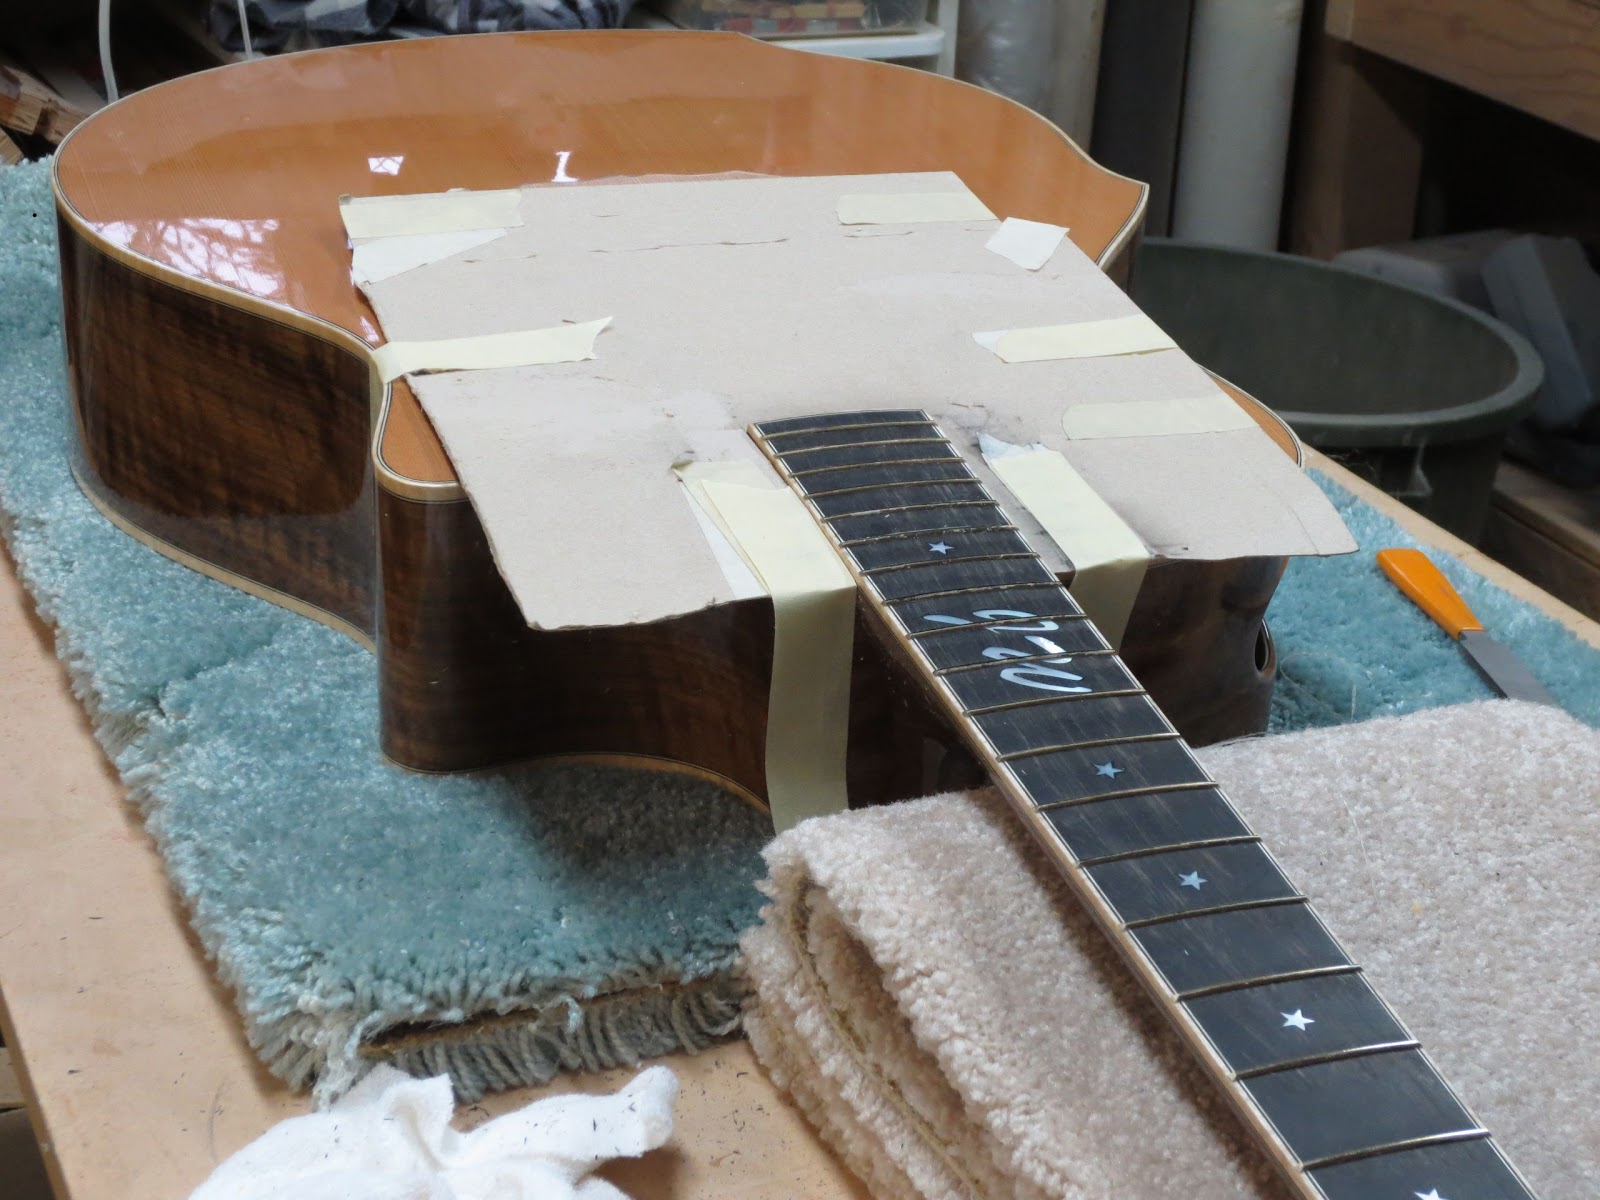
There are two major steps to "finishing the finish": the first is to level the finish - that is to remove all the bumps and low spots in the lacquer; the second is to buff and polish the finish after it has been leveled.

The first thing that needs to be done is to remove the masking from the bridge footprint and the fingerboard overhang. This is a slow and meticulous process, as one false move and the lacquer could chip off where you don't want it to.  Firstly Gerry scores around the mask with an exacto knife, then he slowly lifts, pulls, scores some more, lifts, pulls, etc. until the masking is separated from the guitar. A little blue residue remains on the edges of the footprints. This will be removed later when attaching the bridge and fingerboard. In this shot you can also see how shiny the finish is... well, not for long.

Friday, December 14, 2012

A Guitar Called Jack--Part 60

  So the nitro is on and now for the hard part.  Waiting for the finish to cure.  "A Guitar Called Jack" is  hanging along side a padouk grand concert.... waiting for December.

Thursday, December 13, 2012

A Guitar Called Jack--Part 59

The back of the guitar after the spraying today.  Remember we are still in October.

Wednesday, December 12, 2012

A Guitar Called Jack--Part 58

In this shot you can see not only the guitar (after the 3 coats added today) but also the handle and the support attached to the wall. With this setup, Gerry can spin the guitar to access all sides, without ever touching the guitar. (He did some preliminary leveling of the finish on the soundbox before the spraying today, just as he did with the neck.)

Tuesday, December 11, 2012

A Guitar Called Jack--Part 57

This is a shot of the headstock with about 9 coats of lacquer, after some preliminary leveling of the finish. The final leveling won't occur until early December after the lacquer has cured and shrunk back. You can see that some areas are dull and some are shiny. The objective is to get the entire surface to be dull, which means it is entirely "leveled". Gerry put another 3 coats of lacquer on today, and will add another 3 when he returns from a short trip to Toronto. At that point, the guitar is hung to cure.

Monday, December 10, 2012

A Guitar Called Jack--Part 56

And the back... unfortunately the camera can't do justice to how the figure is emerging under the finish... it really is gorgeous; the sides as well.

So, we've got 3 or 4 coats applied, depending on how you count the two 50/50 seal coats. Yesterday was a great day for spraying, as the temperature was good and the humidity was manageable. Gerry hopes to get in another 3 or 4 coats tomorrow or Friday.

Sunday, December 9, 2012

A Guitar Called Jack--Part 55

The soundbox after the first couple of "sealing" coats are sprayed on (diluted lacquer, the purpose of which is to seal the wood, e.g., to prevent colour from running from the ebony into the maple). You can see how the colours are becoming more vibrant under the finish. (Notice how the figured maple binding is coming alive).

Saturday, December 8, 2012

A Guitar Called Jack--Part 54

The neck is also final sanded. The fingerboard is masked off as is the underside of the fingerboard overhang (which is not visible in this shot). The neck is then mounted onto a holding stick (perpendicular to the neck), which like the dowel for the soundbox, allows Gerry to spray all surfaces of the neck without ever touching it directly. Once sprayed, the neck sits on the masked off fingerboard.

Friday, December 7, 2012

A Guitar Called Jack--Part 53

The body is final sanded with 220 grit after which the fingerboard overhang and bridge footprint are masked off. The soundhole and side soundport are also closed off so no lacquer is inadvertently sprayed into the box. Finally a dowel is attached to the soundbox, where the guitar neck will ultimately go. This facilitates spraying the finish on the guitar without touching the guitar. Once sprayed, the guitar is hung from the dowel.

Thursday, December 6, 2012

Gibson Southern Jumbo


In the first picture is my Dad holding my three year old 1967 Gibson SJ.  I bought this guitar brand new at Harmony Kids on Portage Ave in Winnipeg.  I got it just before the sales tax came to Manitoba.  I used my Fender Concert as a trade--should have kept the Concert but in 1967 I just did not have the cash for both.  In the second photo I am holding Bill Emerson's Pete Seeger Model Vega banjo while looking at my bride Donna.  In the top photo is My Dad (now 92), my Mom, me, Donna, my brother Bob and Bill's wife Maria.  In the bottom photo the kid is my little brother Brian and the hippie is Bill Emerson.  The Vega was stolen, so I'd like to give a shout out to the low life scum who now has it.  Not news that artsy folk, especially musicians are amont the greatest, life loving, kindest and most interesting members of our society, so anyone who steals a musician's instrument has got to be among the worst of the worst of humanity.

A Guitar Called Jack--Part 52


The holes for the tuners are tapered (bigger on the back; smaller on the front).

Wednesday, December 5, 2012

A Guitar Called Jack--Part 51

Hurray! All the ugly shellac on the soundboard has now been removed. There is one final sanding that needs to be done before the finish is applied. But that will wait after initial setup.  Once the initial setup has been completed, Gerry will hit the box with 200 grit, round off the soundhole and binding edges, and then prep for spraying (masking off the overhang of the fingerboard as well as the bridge footprint).

Tuesday, December 4, 2012

A Guitar Called Jack--Part 50

Part 49 showed the before and this is after the side soundport is installed. If you look closely, you can see the "purfling" line on the edge of the port, produced by the ebony and maple veneers Gerry glued onto the inside of the guitar side before it was closed up. (These veneers also reinforce the side around the port.)


Monday, December 3, 2012

Who needs to buy a guitar?

Really--when you get right down to it...

A Guitar Called Jack--Part 49

What a beautiful walnut guitar with the curly maple binding.  That's all I will say for today--just remember this image and stay tuned for "A Guitar Called Jack--Part 50."  The weeks since I started this Blog have flown by, as time does, and today it is considered that the finish on this guitar is sufficiently cured for Gerry to again start the process moving forward.  I do not know how long it takes to complete any of the steps that follow, but hopefully I will as we press forward.  Gerry has been so great at keeping me informed of where we are all during this build.  And just before closing off for today, I would like to congratulate our friend Gord who is the most recent owner of a fine Xaver hand crafted guitar.  He is taking delivery tomorrow or the next day, and is the proud owner of an El-rosewood Mini-Jumbo which may be seen on the Xaver guitars web site.  Too bad for anyone who had their eye on this beautiful guitar, but the good news is that there are others available, or, like me, if you can stand the pressure of the wait, Gerry will build you the guitar of your dreams.

Sunday, December 2, 2012

A Guitar Called Jack--Part 48

Installing the heel cap on the partially shaped neck. The clamp used for this operation? Masking tape.

Saturday, December 1, 2012

Xaver Guitars at the Cumberland Market--Part 2

Today was a great day at the Cumberland Market.  Cold--the temperature outside was the coldest yet this season, but it was warm inside.  Hats off to the hardy venders who braved the elements outside--especially the lady selling the lamb.  We have enough lamb to hopefully last us until the market re-opens in the Spring.  And again I got to play one of Gerry's wonderful instruments with a fellow picker and hopefully another proud owner of an Xaver Guitar.

A Guitar Called Jack--Part 47

How many clamps does it take to glue on a fingerboard? Eight. The board is glued on with white glue (rather than yellow) because it has a lower release temperature. This facilitates the removal of the fingerboard in the future (e.g., should the truss rod need to be replaced.